A Comprehensive Guide to SSH Tunneling
A detailed explanation of how ssh tunneling works.
A Comprehensive Guide to SSH Tunneling
Introduction
Secure Shell (SSH) is widely known for its ability to provide secure remote access to servers, but one of its most powerful and often overlooked features is the SSH tunneling. SSH tunnels allow you to securely route network traffic through an encrypted connection, helping to bypass firewalls, access restricted resources, and enhance security. In this guide, we will explore what SSH tunneling is, how it works, and various practical applications.
What is SSH Tunneling?
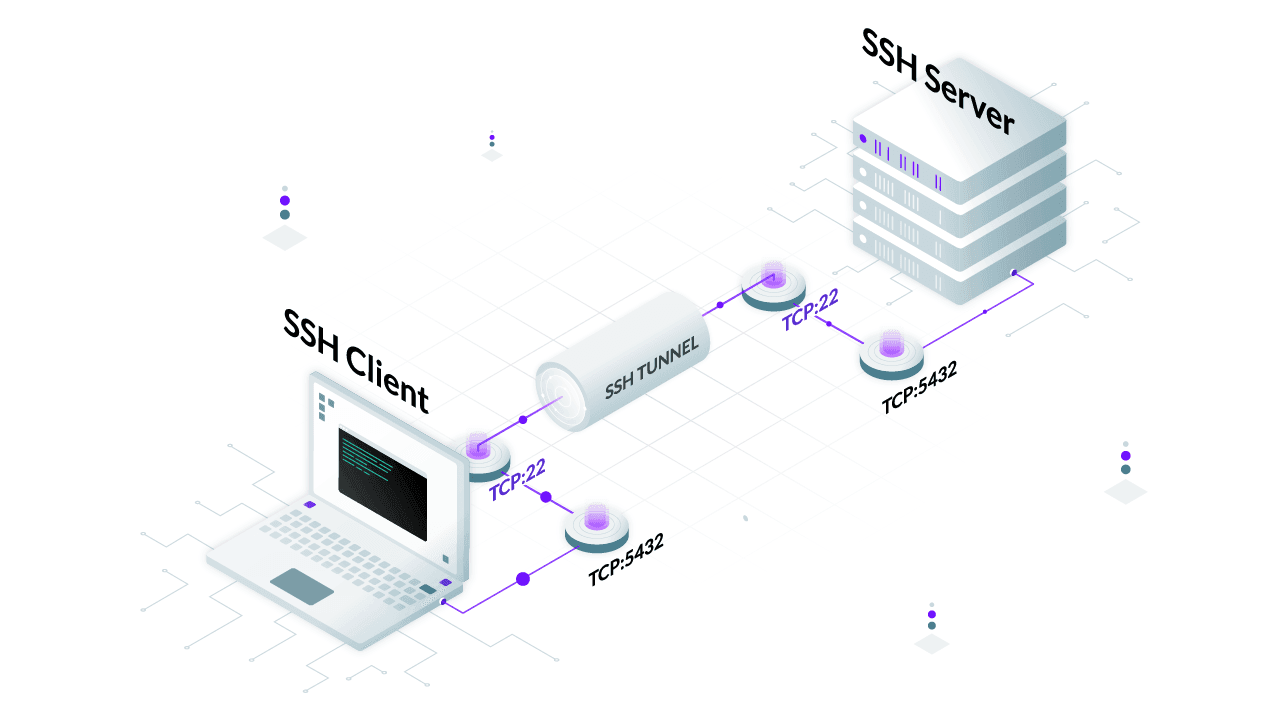
SSH tunneling, also known as SSH port forwarding, is the process of forwarding network traffic from one machine to another over an encrypted SSH connection. This can be used to securely access internal network services, bypass network restrictions, or encrypt otherwise insecure connections.
SSH tunneling can be categorized into three types:
- Local Port Forwarding
- Remote Port Forwarding
- Dynamic Port Forwarding
Let’s go through each one in detail 🥷🏻
1. Local Port Forwarding
Local port forwarding allows you to forward a local port to a remote server. This is useful for accessing services that are only available on a remote network.
Example Scenario Setup
- Home Network:
- Raspberry Pi (Jump Server): Publicly accessible via SSH (IP:
202.221.222.115). - CasaOS: Only accessible on the home LAN running on another Raspberry Pi (IP:
192.168.1.100).
- Raspberry Pi (Jump Server): Publicly accessible via SSH (IP:
You are at your friend’s home and you want to access CasaOS remotely from your friend’s laptop. For that, you can use local port forwarding(-L).
Command to Run on Your Friend’s Laptop:
1
ssh -L 8080:192.168.1.100:80 pi@202.221.222.115
How it Works:

- This command opens specified port 8080 locally on your friend’s laptop for which the browser can connect. Parallel to this, an SSH tunnel is established with the Raspberry Pi(Jump Server) on port 22 from your laptop.
- So when you open your browser and goto
localhost:8080the request generated from your browser gets encapsulated and forwarded through the tunnel to the Raspberry Pi . - Then the Raspberry Pi server makes the conversion from
localhost:8080 —> 192.168.1.100:80and forward it to CasaOS. - The CasaOS server responds, and the data flows back through the tunnel.
Now, you can access CasaOS from your Friend’s Laptop by opening: localhost:8080
2: Remote Port Forwarding
Remote port forwarding allows you to expose a local service to a remote server. This is useful when you want to make a service running on a private network accessible from a public server.
Example Scenario Setup
You are at home, and you want to access your friend’s website database running locally on port 3306 on his laptop . The problem? Your Friend’s Laptop is behind NAT, and its database is only accessible locally.
- Home Network:
- Raspberry Pi (Jump Server): Publicly accessible via SSH (IP:
202.221.222.115).
- Raspberry Pi (Jump Server): Publicly accessible via SSH (IP:
Command to Run on Your Friend’s Laptop:
1
ssh -R 3307:localhost:3306 pi@202.221.222.115
How it Works:

- This command opens port 3307 on Raspberry Pi server and also starts a SSH tunnel between your friend’s computer and Raspberry Pi on port 22.
-
Any connection to
localhost:3307on the Raspberry Pi gets forwarded tolocalhost:3306on your friend’s Laptop - Once your friend executed the command.
- You should SSH into the Raspberry Pi like normal:(Using the local IP because both the Raspberry Pi and your PC are on the LAN)
1
ssh pi@rpi_local_ip
- Once inside the Raspberry Pi’s shell, run:
1
mysql -h localhost -P 3307 -u root -p
💡What happens?
- The Raspberry Pi thinks the database is running on itself (localhost:3307).
- But in reality, it is forwarding queries to localhost:3306 on Friend’s Laptop.
- You can now run SQL commands on the remote MySQL server as if it were local!
3: Dynamic Port Forwarding
Use dynamic port forwarding if you need to browse the internet as if you were on your home network.
Why Is This Useful?
- Bypass network restrictions(e.g., office Wi-Fi blocking websites).
- Protect your privacy on untrusted networks.
- Hide your real IP address (all traffic appears to come from your Raspberry Pi).
- Encrypt your internet traffic when using public Wi-Fi.
Example Scenario Setup
Let’s say you’re at your uncle’s home, and you don’t trust the network (e.g., public Wi-Fi, ISP tracking, or network restrictions). You want to route all internet traffic securely through your Raspberry Pi at home.

Step 1: Create the Dynamic SOCKS Proxy
- On your PC run the following command:
1
ssh -D 8080 pi@202.221.222.115
- This opens port
8080on your PC. - Any application that supports SOCKS proxies can now route traffic through this SSH tunnel.
- Your traffic exits from your Raspberry Pi’s internet connection, hiding your uncle’s network from the websites you visit.
Step 2: Configure Browser to Use the SOCKS Proxy
Now, open Firefox or Chrome on Uncle’s PC and:
- Go to Network Settings.
- Set SOCKS Host:
127.0.0.1and Port:8080. - Enable SOCKS v5.
What happens?
- Now, all web traffic from your browser is encrypted and sent through the SSH tunnel.
- Websites think you are browsing from your Raspberry Pi’s IP address, not your uncle’s home.
- Your uncle’s ISP or network admin can’t see which websites you visit.